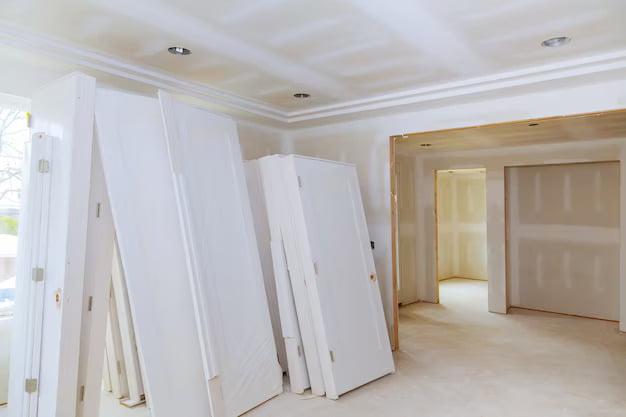
A Comprehensive Guide to Avoiding Common Drywall Taping Mistakes
Drywall taping can be a challenging task, even for experienced DIY enthusiasts.
Achieving a flawless finish, especially in corners, requires skill and attention to detail.
While professional contractors make it look easy, many homeowners struggle to achieve the same level of perfection.
In this guide, we will help you improve your technique and avoid common mistakes when it comes to drywall taping.

1. Choosing the Right Drywall Mud Consistency
Using the correct consistency of drywall mud is crucial for a successful taping job. If you rely on pre-mixed compound straight out of the container, you may encounter problems.
It’s important to ensure that the compound has the right consistency. If it’s too thick, bubbles may form, and the tape won’t adhere properly to the wall.
On the other hand, if the compound is too thin, the tape may tear when you apply pressure. You can adjust the consistency by adding a little water to the pre-mixed compound.
2. Avoiding Excessive Mud Application
The amount of mud you apply directly affects the smoothness of the finish. Applying too much mud can cause the tape to become too wet, leading to it ripping off.
Conversely, if you apply too little mud, the tape won’t embed well in the joint.
Before applying the final coat, you can press the tape to remove any excess mud and ensure a better finish.
3. Applying the Compound with Gentle Pressure
When spreading the compound beneath the tape, it’s crucial to apply gentle pressure.
Applying too much pressure with the knife can cause the tape to move or tear.
To achieve a strong bond between the tape and the wall, make sure to smoothen the mud gently.
4. Prioritizing Inside Corners
Start by working on the inside corners of the drywall first. These areas can be more challenging, especially if you’re using nails or screws to secure the boards together.
To make it easier to smooth the mud in the corners, use a wide knife with a length of 12″ to 16″. By applying the first coat effectively, you’ll minimize the need for extensive sanding after the final coat.
5. Applying Thin Coats
When taping drywall, it’s generally necessary to apply three coats of joint compound. During the second coat, you should still be able to see the tape.
If the tape is completely covered, it indicates that the second layer was too thick.
Thick coats tend to create bulges and result in an uneven surface. It’s best to work with thin coats to achieve a smooth and professional finish.
6. Smoothing Out Bumps and Ridges
One of the most crucial steps in drywall installation is ensuring a smooth surface by eliminating any bumps or ridges.
Don’t try to cover these imperfections with another layer of compound. Instead, wait for the compound to dry and then scrape off the bumps and ridges using a putty knife.
It’s recommended to do this a day after applying the final coat to allow the compound to fully set.
7. Using the Right Knife for Each Task
Having the appropriate knife for each step of the taping process is essential. Different tasks require knives of varying widths.
For instance, when removing bumps and ridges, a small knife with a length of 6″ works well.
On the other hand, spreading the final coat may require a wider knife ranging from 12″ to 16″.
Using the right knife not only makes your work easier but also ensures a smoother finish.
8. Avoiding Thick Mud
Working with thick mud can make the taping process significantly more challenging.
If you don’t add water to the compound, you may end up tearing the tape while trying to spread the mud evenly.
Additionally, thick mud tends to be sticky and requires the right knife to distribute it properly.
To avoid complications, it’s best to avoid using thick mud and opt for a more manageable consistency.
9. Applying Compound in the Right Direction
When applying the compound, it’s important to swipe in the right direction to minimize the risk of tape tearing.
Instead of swiping vertically or from top to bottom, it’s best to swipe horizontally from one corner to the other.
This technique helps ensure a smooth and seamless finish.
10. Proper Sanding Techniques
Sanding plays a crucial role in achieving a polished and professional look for your drywall.
After applying the final coat and allowing it to dry, start sanding the surface using fine-grit sandpaper.
Take care not to sand too aggressively, as it can damage the tape and underlying layers of compound.
Gradually sand the surface, focusing on any imperfections or rough areas. Remember to wear a dust mask and eye protection during the sanding process.
***
Now that you’re equipped with the knowledge to avoid common drywall taping mistakes, you can confidently tackle your next DIY project.
By following these tips and techniques, you’ll be able to achieve a flawless finish and transform your space with beautifully taped drywall. Happy taping!
Additional Information:
- How to Successfully Bid Drywall Jobs: A Comprehensive Guide
- How to Use Spackle vs Joint Compound – What’s the Difference?
- How to Measure Drywall: A Rule of Thumb for Accurate Project Estimates