Furred Out Walls: Enhancing Insulation and Aesthetics
When it comes to building practices, furring out walls is a common technique employed by housebuilders.
By adding thin strips of wood or other materials to a wall’s structure, builders can achieve various purposes.
In this article, we will explore what furred out walls are, their benefits, and the process involved.
Whether you want to improve insulation, enhance the appearance of your walls, or create a sound barrier, furring out walls can be a valuable solution.
What are Furred Out Walls?
A furred out wall refers to a wall that has been reinforced with thin strips of wood or other materials.
This process involves adding these strips to the existing wall structure to achieve specific goals.
Builders employ this technique for multiple reasons, including improving insulation, enhancing appearance, and expanding the wall’s thickness.
Benefits of Furred Out Walls
1. Improved Insulation
One of the primary benefits of furring out a wall is enhanced insulation.
By creating an additional layer with the furring strips, the wall becomes more resistant to temperature changes.
This results in a more comfortable indoor environment throughout the year.
With improved insulation, you can reduce the need for excessive heating or cooling, leading to significant energy savings and lower electricity bills.
2. Enhanced Appearance
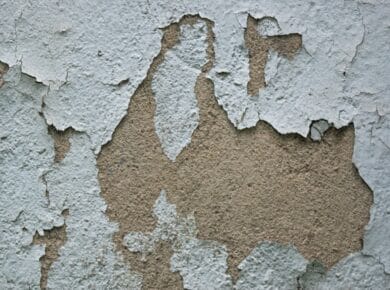
Furred out walls can also greatly improve the aesthetic appeal of your space. If you have uneven surfaces or imperfections on your walls, furring them out can provide a solution.
By attaching the thin strips, you can level the wall surface, making it smooth and even.
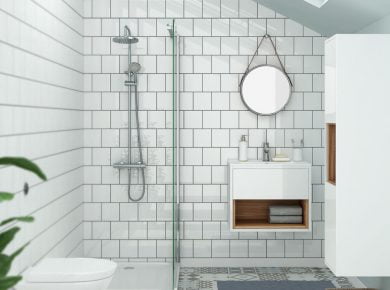
This is particularly useful when planning to install built-in cabinets, as it ensures a seamless integration with the wall.
3. Easier Installation of Finishings
Furring out a wall makes it easier to install various finishings such as drywall, paneling, or other decorative elements.
Whether you want to add a new cabinet in your kitchen or create a feature wall in your living room, furring out the wall provides a stable and even surface for easy installation.
This saves time and effort during the finishing phase of construction or renovation projects.
4. Sound Barrier Creation
If you require a quieter space for studying, working, or sleeping, furring out the walls can help create a sound barrier.
By making the walls thicker, the furring strips contribute to reducing noise transmission from outside.
While it may not achieve complete soundproofing, it can significantly dampen unwanted sounds, providing a more peaceful environment.
5. Increased Wall Thickness
Furring out a wall allows you to increase its thickness. This can be beneficial in several ways.
Firstly, a thicker wall provides better insulation, as mentioned earlier. Secondly, it offers improved structural integrity, making the wall more resistant to damage.
Lastly, the added thickness can accommodate the installation of additional features like insulation material or wiring.
Process of Furring Out a Wall
Furring out a wall involves several steps to ensure a successful outcome.
Let’s explore the process of furring out walls using wood studs and concrete walls separately.
Furring Out a Wall with Wood Studs
When working with wood studs, follow these steps to effectively furr out a wall:
- Measure and Mark: Start by measuring and marking the desired spacing for the furring strips. It is crucial to align the vertical lines with the existing wood studs.
- Locate Studs: Use a stud finder to locate the wood studs behind the wall surface. This will help ensure that the furring strips are securely attached to the wall structure.
- Vertical Lines: Draw vertical lines on the wood studs, indicating the placement of the furring strips. These lines will serve as a guide during the installation process.
- Drill Holes: Drill holes into the wood studs based on the marked spots. These holes will accommodate the anchors for attaching the furring strips.
- Attach Furring Strips: Apply adhesive to one side of the furring strips and secure them to the wood studs using screws or nails. Make sure the strips are aligned with the vertical lines for a level finish.
- Professional Assistance: If you are unsure about your handyman skills or lack experience in this process, it is advisable to seek the help of a qualified carpenter.
Furring Out a Concrete Wall
Furring out a concrete wall requires a slightly different approach. Here’s how to do it effectively:
- Plan Spacing: Determine the spacing between the furring strips based on the desired finish. For plaster, closer spacing may be required, while wider spacing is suitable for wood planks.
- Marking: Use a measuring tape and pencil to mark dots at regular intervals along the bottom and top of the wall. Connect the dots vertically to create lines for attaching the furring strips.
- Concrete Anchors: Install sleeve anchors into the concrete wall at the marked spots. Ensure they fit securely into the holes and provide a stable base for the furring strips.
- Drill Holes: Using a hammer drill with carbide-tipped masonry drill bits, drill holes into the concrete wall based on the marked lines. The holes should be approximately 8 to 10 inches apart.
- Clean Holes: Remove any debris from the drilled holes using a wire brush or a shop vacuum. This ensures a proper fit for the sleeve anchors.
- Attach Furring Strips: Align the furring strips with the marked lines and insert screws into the sleeve anchors. Repeat this process across the width of the wall, ensuring a secure attachment.
- Finishing Touches: Once the furring strips are in place, you can proceed to install drywall or wood paneling to complete the wall finish.
Considerations Before Furring Out a Wall
Before embarking on a furring out project, it is essential to consider the following factors:
- Window Casing: If the furred out wall is adjacent to a window, you may need to install a new window casing to accommodate the increased wall thickness.
- Space Considerations: Furring out a wall reduces the livable space within a room. Take this into account when planning furniture arrangements or spatial requirements.
- Preparation: Remove any obstacles such as radiators, light switch covers, or doors before starting the furring out process. These items can be reattached once the wall is complete.
- Panel or Drywall Installation: After furring out a wall, it is crucial to install a panel or drywall to prevent heat loss and ensure a polished finish.
- Base Wall Paneling: If the existing wall has base wall paneling or trimmings, they may need to be removed before furring out the wall. Replacement of these elements may be necessary to fit the new wall dimensions.
Conclusion
Furring out walls is a valuable technique used by builders to improve insulation, enhance aesthetics, and create functional spaces.
Whether you want to reduce energy consumption, achieve a seamless wall surface, or create a sound barrier, furring out walls offers a range of benefits.
By following the appropriate process and considering important factors, you can successfully furr out walls using wood studs or concrete.
Enhance your space with improved insulation and a polished appearance through the practice of furring out walls.